This is the second bonus post in my course Rails Companion: build a web application in Ruby without Rails. Today, we'll learn how routing works in its essence and build our own router from scratch, without using any third-party gems. We'll use some metaprogramming, but I promise it's nothing complicated.
If you decide to enroll, thank you. Your support (and feedback) is really appreciated 🙏

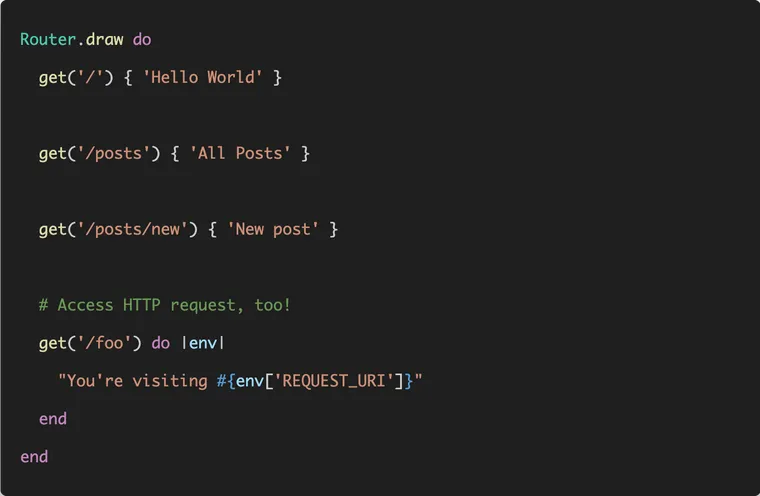
Our router will look somewhat similar to Rails. It will accept a URI and a block, providing a very simple and expressive method to define routes and behavior without complicated routing configuration.
Router.draw do
  get('/') { 'Hello world' }
end
The only difference is this: instead of directing to a resource, or a controller#action like Rails router, our router returns a plain string response, just like Sinatra.
Note: If you haven't read them already, check out the course announcement and the first bonus article in the course:
 Akshay Khot
 Akshay Khot
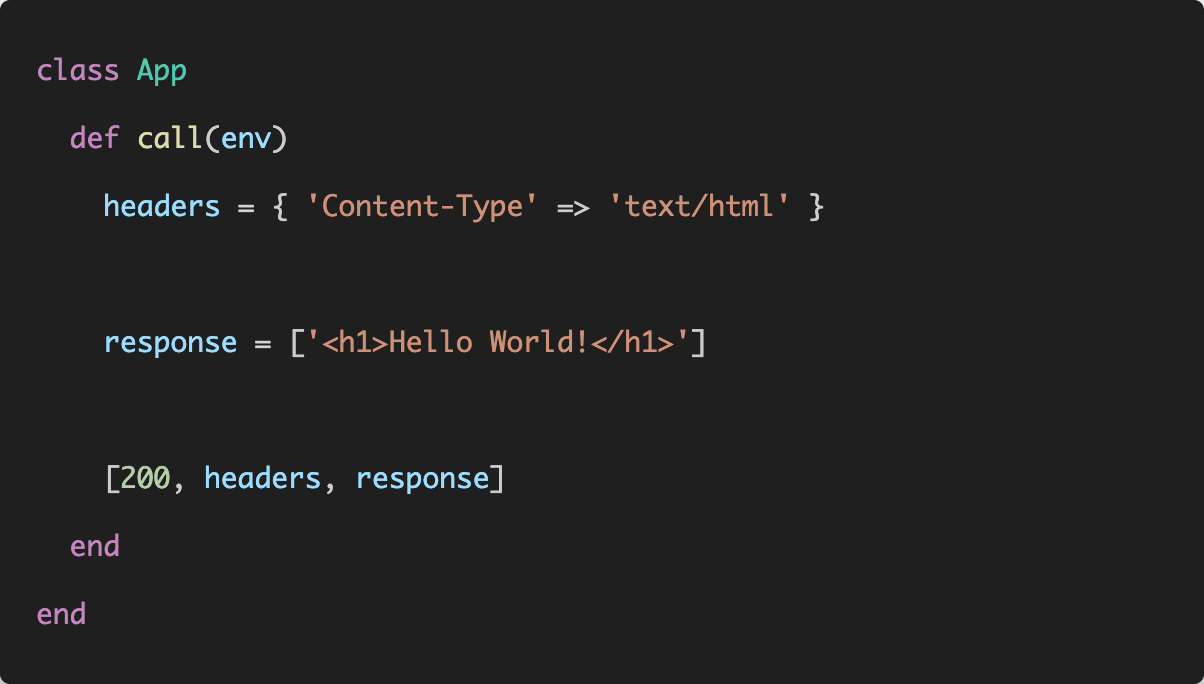
In future articles in the series, we'll implement our own controllers and models, process forms and query data, connect to the database, write our own authentication, and much more. All in plain Ruby, too! If that sounds interesting, consider enrolling in the course.
Finally, if you don't want to read the full article (>2000 words) and just want to see the final code, check out the GitHub repository and switch to the rails-router branch.
Alright, let's start by understanding what a router is and what it does, in the context of a web application.
What is a Router?
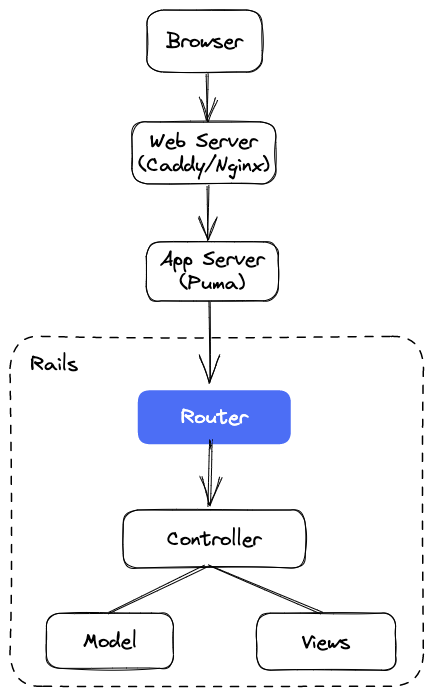
A router is that part of the web application that determines where the incoming request should go. It figures it out by examining the request URL and then invoking a pre-defined function (or a handler) for that path. Internally, it stores the mapping between the URL patterns and the corresponding handlers.
In Ruby on Rails, the router sends the incoming request to an action method on a controller.
controller#action code.To learn more about the Rails Router in-depth, please read the following post:
Akshay Khot
In fact, it would be better if you first read the above article and then come back to this one. That will give you a much better context to understand this post. Don't sweat it, though! I assume no prior knowledge of routing to understand this post.
Current Setup
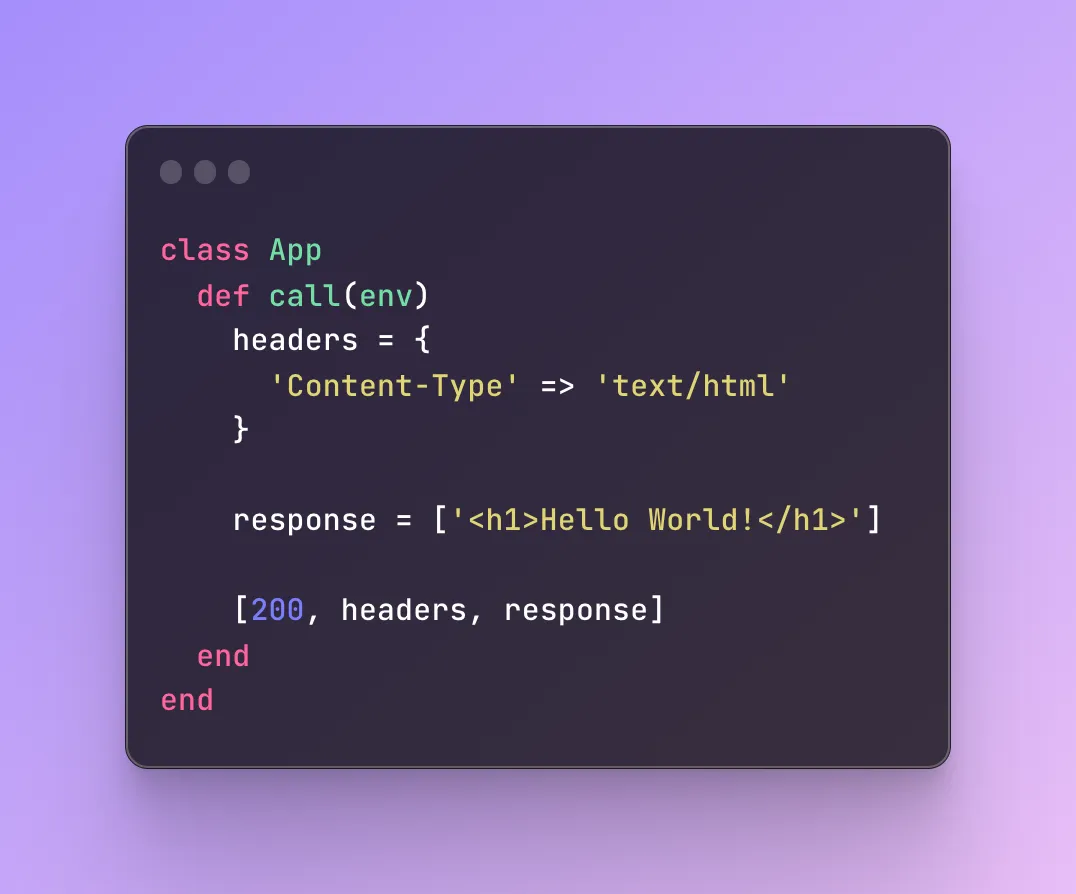
If you've read the first article in the series, you should have the following script, which is a barebone, simple-yet-complete web application.
# # weby/app.rb

class App
  def call(env)
    # a hash containing response headers
    headers = {
      "Content-Type" => "text/html"
    }

    # an array containing the HTML response string
    response = ["<h1>Hello World</h1>"]

    # an array containing
    # 1. HTTP status code
    # 2. HTTP headers
    # 3. HTTP response
    [200, headers, response]
  end
end
Right now, our application does only one thing. Whenever a request arrives, it returns the response Hello World! to the browser. It sends the same response, regardless of the request URL.
➜ curl localhost:9292
<h1>Hello World</h1>

➜ curl localhost:9292/posts
<h1>Hello World</h1>

➜ curl localhost:9292/posts/new
<h1>Hello World</h1>
Having a web application that returns the same response for every request isn't very exciting... or useful! Let's make it smart by returning a different response based on the incoming HTTP request's path.
To keep things simple, I'll make the following assumptions:
- Our application only supports HTTP GET requests,
- It only needs to handle the following three routes.
| URL Pattern | Action |
|---|---|
| / | shows the home page |
| /articles | shows all articles |
| /articles/1 | shows a single article |
| /random | "no route found" |
- For all other URLs, it returns
no route foundmessage.
Let's get to it.
The Router Class
Let's create a new Router class in the current directory as follows. It maintains a @routes Hash as the internal data structure to store the URL patterns along with their corresponding handlers.
# weby/router.rb

class Router
  def initialize
    @routes = {}
  end

  def get(path, &blk)
    @routes[path] = blk
  end

  def build_response(path)
    handler = @routes[path] || -> { "no route found for #{path}" }
    handler.call
  end
endIf you're not that familiar with blocks and lambdas in Ruby, this code might not make much sense. I recommend you read the following post for a deeper understanding of blocks, procs, and lambdas.
Akshay Khot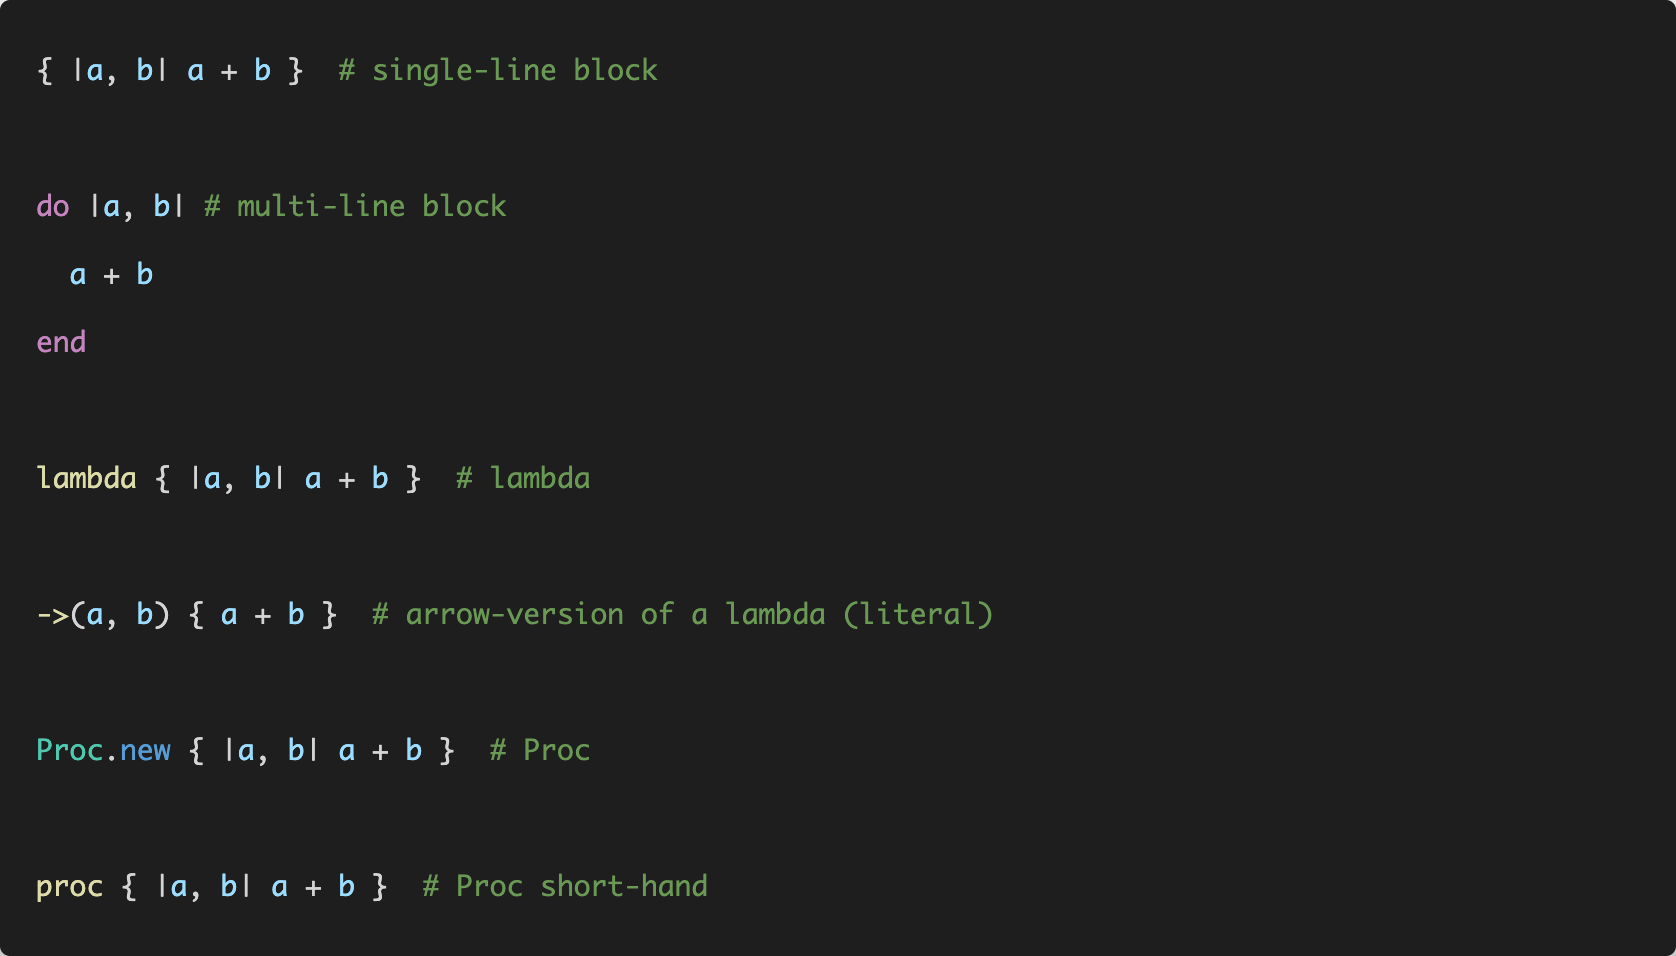
The get method takes a URL path and a block as arguments. The block represents the handler code that should be executed when a request matching that path arrives. It then stores the path along with the handler in the @routes hash.
def get(path, &blk)
  @routes[path] = blk
end
Finally, the build_response method takes the path of the current request. It finds the corresponding handler from the @routes mapping. If the path is not stored in the mapping, we set the handler to a default lambda that returns the message no route found.
def build_response(path)
  handler = @routes[path] || -> { "no route found for #{path}" }
  handler.call
end
Once we find the handler block for the current path, we call it and return the generated output back to the application.
Using the Router
Let's put the Router class to good use.
First, we define the routes that our application needs, and then we use the build_response method on the router to generate the HTTP response.