Docked Rails CLI is a simple command-line tool for setting up a new Rails application with Docker. It provides a fantastic starting point for running a Rails application in a container, without worrying about installing specific versions of Ruby, Node.js, or SQLite. This frees you, the developer, to focus on application logic and makes it easy to deploy the containerized app.
At its heart, Docked is a very simple Dockerfile and a docked alias to interact with Docker. The docked alias allows you to run the common Rails commands, such as rails db:migrate, rails generate, or rails server in isolated containers.
Here's a list of all the topics this article covers:
- Authenticating with GitHub Container Registry
- Creating a Volume as Bundle Cache to Store the Ruby Gems
- Using the
dockedAlias - Creating and Running a Rails Application on Docker
- Understanding the Dockerfile Used by Docked
- Accessing the Docked Container CLI
This post assumes that you have already installed Docker and are familiar with its basic concepts, such as images, containers, and volumes. With that out of the way, let's focus on dockerizing a Rails application.
Step 1: Authenticate with Github Container Registry
Docked uses the Rails CLI image, which is hosted on GitHub Packages. Like Dockerhub, GitHub Packages is a platform for hosting and managing packages, including containers and other dependencies.
You can store and manage your Docker images in the GitHub Container Registry, which uses the package namespace https://ghcr.io. To access the Rails CLI image, you must authenticate to the GitHub container registry using a Personal Access Token.
The official documentation provides detailed instructions on creating personal access tokens. Once you have an access token, you need to log in to the registry.
First, save the token as an environment variable.
➜ export CR_PAT=YOUR_TOKENNext, sign in to the Container registry service at ghcr.io.
➜ echo $CR_PAT | docker login ghcr.io -u USERNAME --password-stdin
> Login Succeeded
To test successful authentication, try pulling the Rails CLI image from the registry.
➜ docker pull ghcr.io/rails/cliIf it works without any issues, then you're authenticated successfully. Move on to the next step.
Step 2: Create a volume to store the Gems
Containers are ephemeral—throwaway things that we spin up, use, and then delete.
To run a Rails app, we need to install all the required gems using the bundle install command. However, since we're running the Rails app in a container, and the container data doesn't persist when that container exits, we need to store these gems somewhere locally.
Docker uses volumes for persisting data generated by and used by containers. By mounting a volume in the directory where Bundler installs our gems, we can run bundler commands to populate and manage the gems on this volume. Hence it effectively becomes a local gem cache.
Let's create a new volume for the bundle gem cache using the volume create command.
➜ docker volume create ruby-bundle-cache
Ensure that the volume is created by listing all the volumes.
➜ docker volume ls

DRIVER    VOLUME NAME
local 	  ruby-bundle-cache
Step 3: Add Docked Alias
When using Docker, your Rails app runs within a Docker container and is isolated from your local computer. However, Docked provides a convenient way to run various commands against your application, such as arbitrary Ruby or Rails commands, bundler commands, Ruby Gem commands, and Node / NPM commands.
To interact with the Rails app, you need the following docker command (don't run the command yet).
➜ docker run --rm -it \
-v ${PWD}:/rails \
-v ruby-bundle-cache:/bundle \
-p 3000:3000 \
ghcr.io/rails/cli \
your-rails-command
This command creates a throwaway container and uses two volumes, one for the gem cache and another for the application code. Then it interactively runs a command you provide in the container's terminal.
Here's a short explanation of various parts of the command.
docker run: Runs a process in a container. We'll use it to run rails commands inside the container created with the Rails CLI image.--rm: Automatically clean up the container and remove the file system when the container exits.-it: Run an interactive bash session inside the container. This is a shorthand for the combination of--interactive (-i)and--tty (-t)flags.-v ${PWD}:/rails: Mount the current working directory (returned by thePWDcommand) onto the/railsdirectory inside the container.-v ruby-bundle-cache:/bundle: Mount theruby-bundle-cachevolume we created in step 2 onto the/bundledirectory inside the container. We will learn how bundler will use this directory when we inspect theDockerfilelater.-p 3000:3000: Publish the port 3000 on container on port 3000 on the host machine, i.e. on your laptop. This allows you to access the app on the browser.ghcr.io/rails/cli: The dockerized Rails image, which we already pulled in step 1.your-rails-command: The Rails command you want to run in the container, e.g.rails serverorrails new.
Using docked Alias
Just reading this huge command hurts my eyes. Forget using it for all the Rails commands. Thankfully, you can use an alias to map this command to a simple word docked (you can use any term you want).
➜ alias docked='docker run --rm -it -v ${PWD}:/rails -v ruby-bundle-cache:/bundle -p 3000:3000 ghcr.io/rails/cli'
To make sure this is always available, add this to your shell configuration file in your home directory, such as ~/.zshrc or ~/.bashrc, and then restart your shell.
Once the shell alias has been configured, you can execute rails commands by simply typing docked, and providing the command to run. Let's check the Rails version to ensure everything is set up properly.
➜ docked rails --version
Rails 7.0.4.2
Much better, right? That's all the setup we need.
Step 4: Create and Run a Rails Application
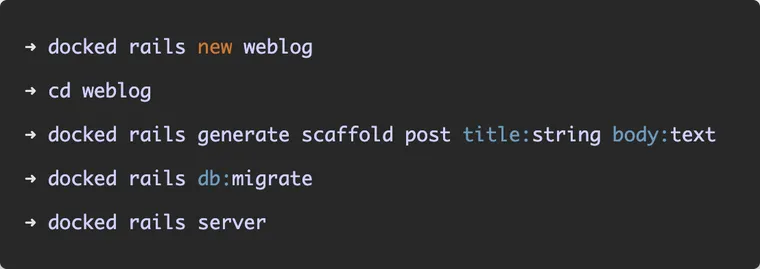
It's time to create and run a real application inside a container. For this, type the usual rails new command with the docked alias.
➜ docked rails new weblog
➜ cd weblog
Now you can run any of the usual Rails commands to build your application.
➜ docked rails generate scaffold post title:string body:text
➜ docked rails db:migrate
➜ docked rails server
Let's run the app using the rails server command.
➜ docked rails serverThat's it! Your app is now running inside a container. Access it in the browser at http://localhost:3000/posts.
If you want to go one step further and avoid having to type docked at all before each command, you can add the common commands as aliases:
➜ alias rails='docked rails'
➜ alias rails-dev='docked bin/dev'
➜ alias bundle='docked bundle'
➜ alias yarn='docked yarn'
➜ alias rake='docked rake'
➜ alias gem='docked gem'
Understanding the Dockerfile used by Docked
Let's take a look at the Dockerfile used by docked on GitHub; it's not that complicated. In this section, we'll try to understand each step in detail.
FROM ruby:3.2
Start from the Ruby 3.2 base image.
RUN curl -sL https://deb.nodesource.com/setup_19.x | bash -
Ensure node.js is available for apt-get.
RUN apt-get update -qq && apt-get install -y build-essential libvips nodejs && npm install -g yarn
Install dependencies necessary for running a Rails application. We need to run the update and install commands in the same line to avoid using stale package versions. This is because Docker caches the results of running each step (probably a topic for a separate blog post).
WORKDIR /rails
Mount the current working directory, in which the Rails app will be created, to the /rails directory in the container. From the official documentation,
The WORKDIR instruction sets the working directory for any RUN, CMD, ENTRYPOINT, COPY and ADD instructions that follow it in the Dockerfile. If the WORKDIR doesn’t exist, it will be created even if it’s not used in any subsequent Dockerfile instruction.
VOLUME /bundle
RUN bundle config set --global path '/bundle'
ENV PATH="/bundle/ruby/3.2.0/bin:${PATH}"
The VOLUME instruction creates a mount point named /bundle and marks it as holding externally mounted volumes from the native host. Remember that we created a volume named ruby-bundle-cache in Step 2 and mounted it to /bundle in Step 3. This ensures gems are installed on a persistent volume and available as bins.
RUN gem install rails
The RUN instruction executes any commands provided. We use it to install the latest version of Rails in the resulting image.
ENV BINDING="0.0.0.0"
The ENV <key>=<value> instruction sets the environment variable <key> to the value <value>. Here, we ensure binding is always 0.0.0.0, even in development, to access the server from outside the container.
ENTRYPOINT [""]
An ENTRYPOINT allows you to configure a container that will run as an executable. Here, we're overwriting the ruby image's entrypoint to provide an open command-line interface, so we can run any commands we want when creating and running a container.
Accessing the Docked Container CLI
Sometimes you may want to start a terminal session within your application's container. You may use the bash command to connect to your application's container. This allows you to inspect your application files and execute any arbitrary shell commands within the container.
weblog ➜ docked bash

root@ebbe23713775:/rails ls
Gemfile  Gemfile.lock  README.md  Rakefile  app  bin  config  config.ru  db  lib  log  public  storage	test  tmp  vendor
To start a new Rails console session, use the rails console command.
weblog ➜ docked rails console

Loading development environment (Rails 7.0.4.2)

irb(main):001:0> Post.count

  Post Count (2.1ms)  SELECT COUNT(*) FROM "posts"
=> 0
That concludes our exploration of the Docked CLI. I hope that you now have a working, containerized Rails application up and running.
I hope you found this article useful and that you learned something new.
If you have any questions or feedback, didn't understand something, or found a mistake, please leave a comment below or send me an email. I look forward to hearing from you.
Please subscribe to my blog if you'd like to receive future articles directly in your email. If you're already a subscriber, thank you.